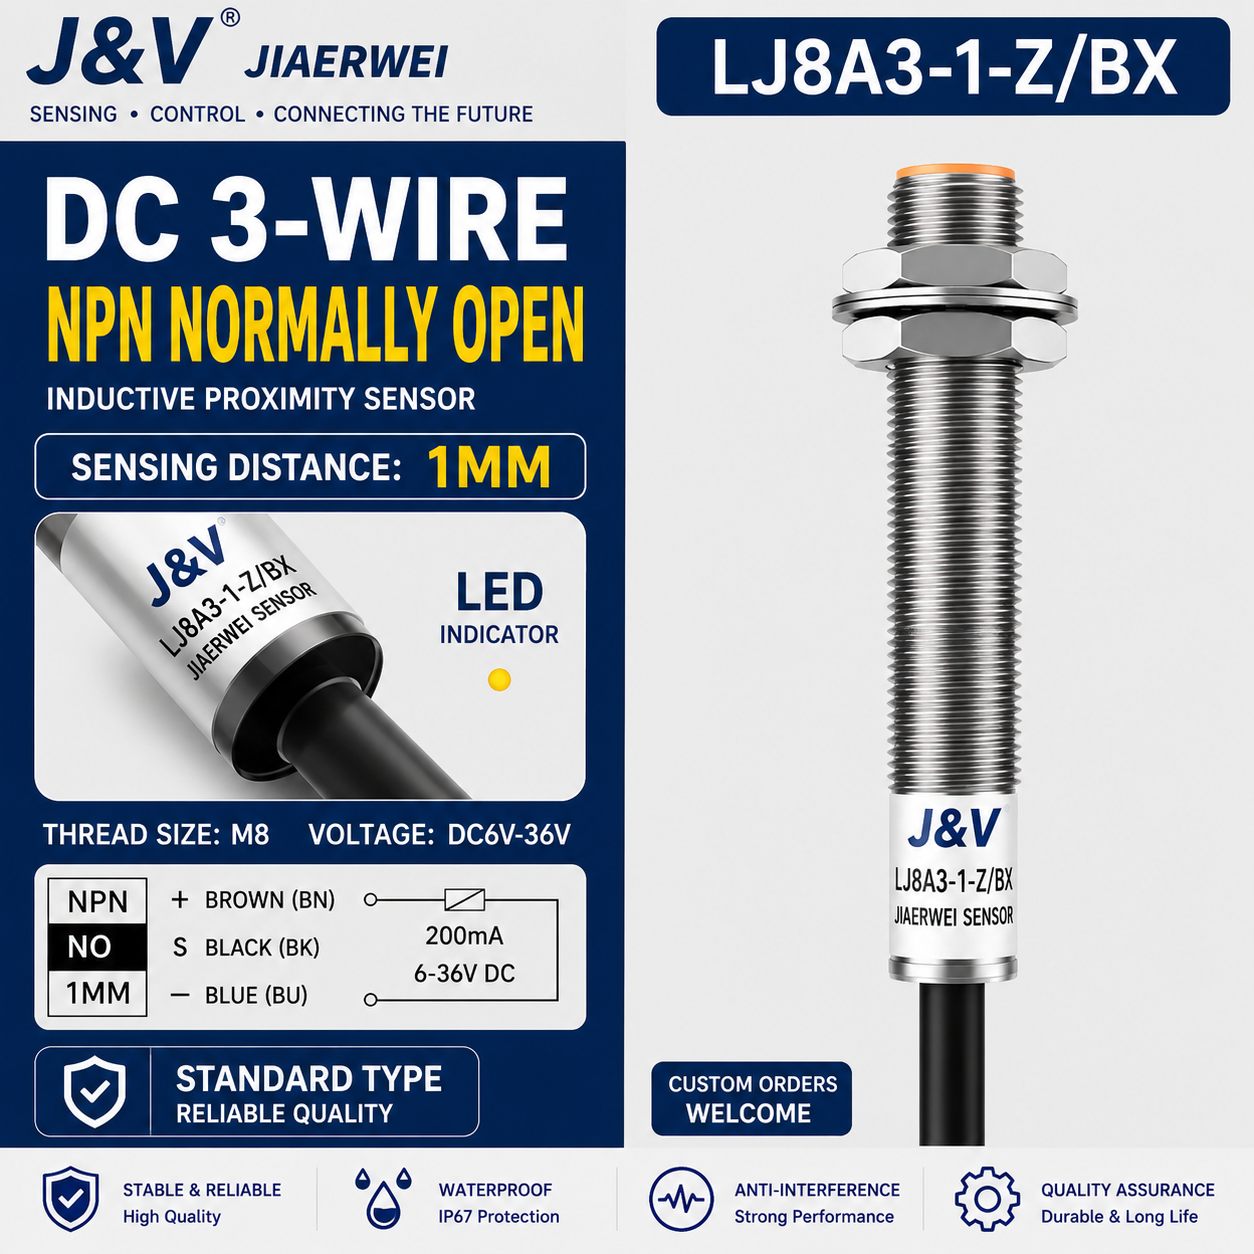
LJ8A3-1-Z/BX: 1 mm Flush Example
The label shows M8 thread, DC three-wire NPN normally open output, 1 mm sensing distance, common brown/blue/black wiring and a flush sensing face.
M8 inductive proximity sensor checklist with real J&V LJ8A3 label examples: compare flush or non-flush mounting, 1 mm or 2 mm range, NPN/PNP, NO/NC, voltage, cable and target speed.
For a compact metal target, first decide whether the sensor must sit flush inside a metal bracket. Then match the real operating gap, output and wiring. The J&V LJ8A3 examples below show why two M8 sensors with the same body diameter can still differ in sensing distance and mounting requirement.
| 1. Body and length | Confirm M8 thread, overall length, nut space and cable exit clearance |
|---|---|
| 2. Mounting | Choose flush for a sensing face embedded in metal; choose non-flush only when the head has the required free zone |
| 3. Working gap | Use the real target gap plus margin; do not operate continuously at the nominal maximum distance |
| 4. Target | Confirm metal type, target size and alignment because smaller or non-ferrous targets can reduce the effective distance |
| 5. Output | Match PNP or NPN to the PLC input common |
| 6. Logic | Match normally open or normally closed machine behavior |
| 7. Electrical load | Confirm supply voltage, load current, leakage expectations and switching frequency |
| 8. Connection and environment | Confirm cable length or connector, IP requirement, oil, vibration and ambient temperature |
These two J&V label images are practical selection examples. Both are M8, DC three-wire, NPN normally open sensors, but the sensing distance and mounting rule are different.
The label shows M8 thread, DC three-wire NPN normally open output, 1 mm sensing distance, common brown/blue/black wiring and a flush sensing face.
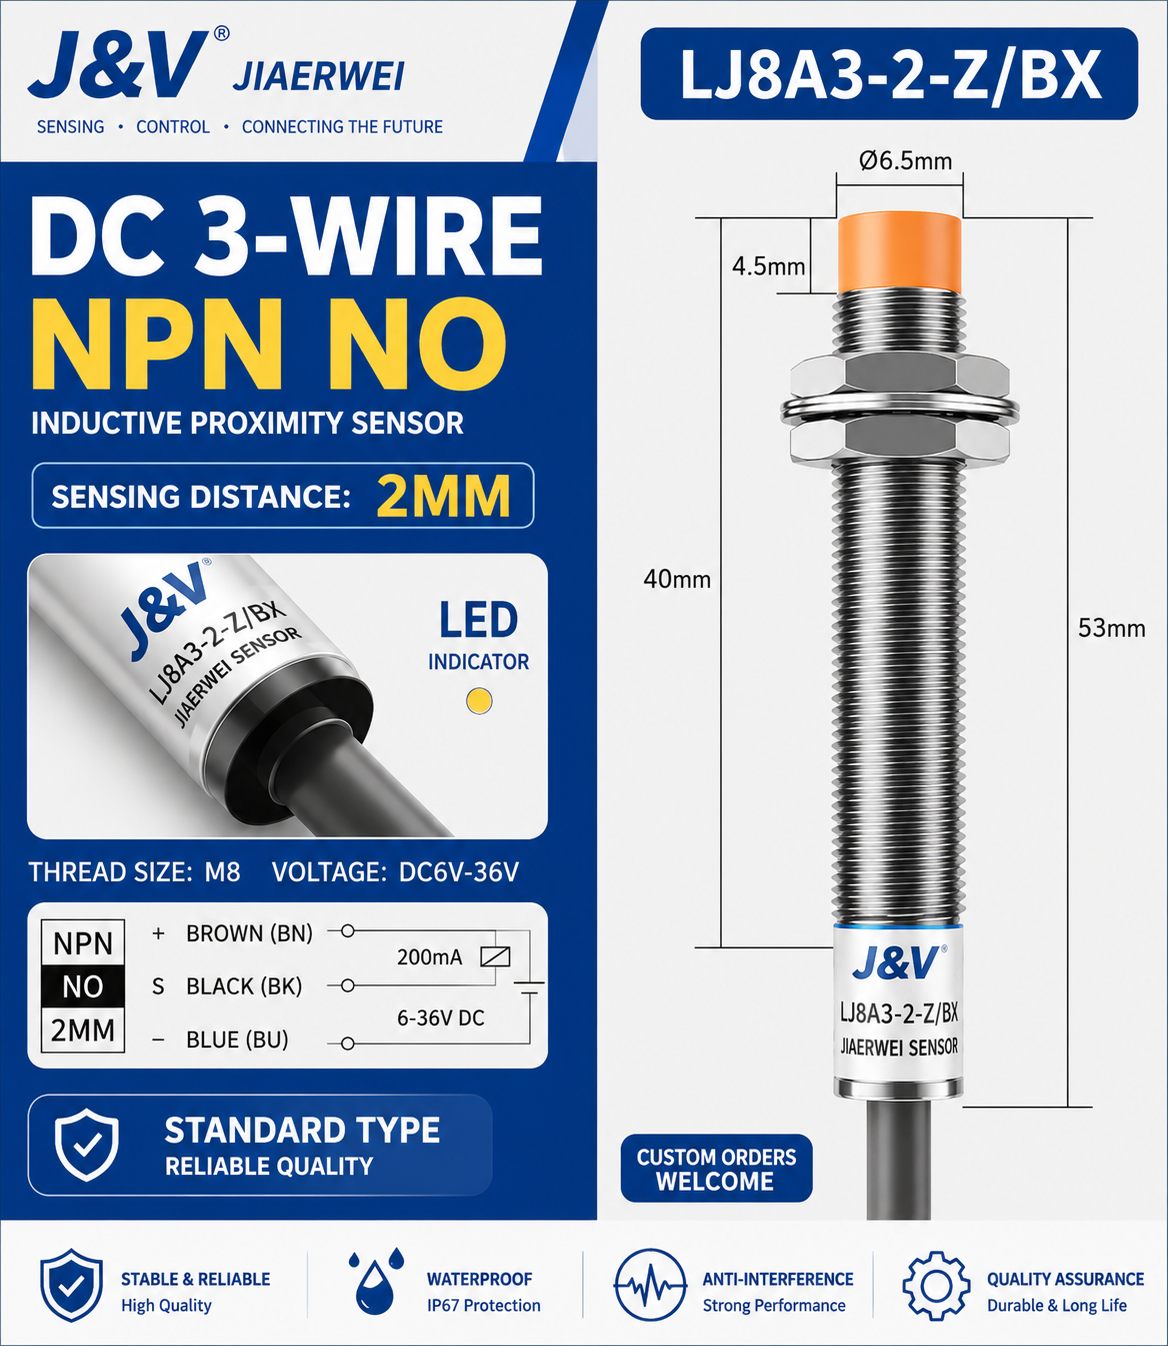
The label shows the same M8 and NPN/NO family, but a 2 mm sensing distance and a protruding non-flush sensing face that needs clearance around the head.
Important: these specifications apply to the shown models. Verify the exact label or datasheet for any other M8 sensor.
M8 Proximity Sensor selection checklist
Use an M8 proximity sensor when space is tight and the target is close. Confirm the short sensing distance before replacing a larger sensor.
For real industrial purchasing, the safest method is to compare the old part, the electrical input, the mechanical fit and the application before treating two models as interchangeable.
M8 Proximity Sensor selection checklist Start by confirming the real machine condition, then compare wiring, target, environment and replacement constraints before ordering.
Send the model number, label photo, installed photo, target material, voltage, output type and quantity.
Yes. Wiring type, mounting style, sensing mode and environment often decide whether an alternative will work correctly.
| Technical review | J&V Automation technical sales team |
|---|---|
| Last reviewed | 2026-08-05 |
| What we check | Model code, label photo, wiring, sensing distance, mounting, voltage, output and application environment |
| Contact | info@jv-automation.com / WhatsApp +86 15757759002 |
| Page type | knowledge answer page |
For final ordering, J&V Automation asks buyers to send the old label, installed photo, quantity and destination country before confirming an alternative.